
One of the biggest headaches is troubleshooting electrical problems on boats. In this segment, we’ll teach you how to prevent the most common boat electrical issues, how to troubleshoot your boat’s electrical problem and how to remedy the situation.
Saltwater and electricity do not mix well and unfortunately if left unattended it can cause a variety of issues. The foremost important corrosion issue is battery terminals and cables. To prevent corrosion, you should inspect your battery terminals, connections and major leads at least every 3 months. If you have visible corrosion we recommend you use a corrosion inhibitor or replace the component altogether. Lastly, make sure you tighten down your battery cables firmly. There shouldn't be any “play” in the battery cable terminal that connects to your battery. All batteries should come with a stainless steel nut to tighten down the battery terminal lead to your battery. However, we recommend a good stainless steel “stop nut”. This will prevent the nut from loosening over time and won’t leave you scratching your head on the water wondering why all of the sudden your motor will not start.
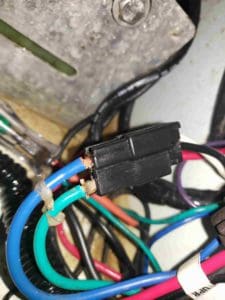
Often we find battery terminals, leads and critical wiring with corrosion that has turned copper wiring into brittle fibers that can no longer transport the electrical charge to perform the function required. If you peel back the plastic wire coating and see that the copper wire has either a dull rust color, green or white corrosive look to it or a charred black faded look then it’s time to replace that wire because it is not conducive and basically the wire isn’t transmitting the sufficient amount of electrical current to the product (motor, bilge pump, livewell pump, etc.) for it to operate properly. Therefore, you may notice that the product operates intermittently or at a very low ability or most often not at all.
Additionally, you may notice that the wire is brittle and can easily break off which is another indicator that it needs to be replaced. The copper wire should have a bright metallic finish and should be pliable. Lastly, it’s important to note that once corrosion starts you cannot stop it, you can only slow it down. Therefore, the most assured way to fix a corrosive component is to replace it. However, don’t start yanking wires out of your boat just yet. It is important to identify the source of your problem. One of the easiest ways is to work from the product (bilge pump, livewell pump, power pole, etc.) back to the battery. So, let’s get to it and find your problem.
Step one, ensure you have a good 12V boat battery or spare to test your components with.
Step two is to build yourself a set of jumper testing leads. Basically, you are creating a set of jumper cables just a lot smaller in size. Save yourself a ton of money and go to Northern Tool, Autozone, etc. versus purchasing them at West Marine. You can buy them with the clips already attached which cost a little more upfront but will save you time in the long run. For mostly everything on the boat barring testing the motor, you can get away with 10-12 gauge wiring but feel free to go heavier based on the component. You will need the wire to be long enough to run from your battery to the component we are testing.
Step three, connect the positive and negative lead clips to your battery ensuring that the other exposed ends of the clips are not touching.
Step four, it is always good to take a picture of the component with your phone prior to disconnecting anything. Next, disconnect the terminal leads to your component and run the positive and negative clips to your component ensuring that you are matching the positive and negative leads correctly. Your component should fire up. If it doesn’t then your component is faulty.
If your component does run properly while you have the leads on it, we can determine there is a problem in between the component and the power source. So, begin to work your way back to the switch starting with the connections to the component. Most often, that is where you will find your problem which is a corroded connection and/or wiring.
A good way to measure this is with a voltmeter. In this stage, you simply apply the voltmeter leads to the “hot” wire while ensuring the black voltmeter lead is grounded either to a ground wire or a sufficient ground on your boat. It should read the same as when you directly touch the voltmeter leads to your battery itself. If not, you have a problem in between. If the wiring looks good (as discussed above) then your next move is to check the switch which turns the component on or off using the voltmeter in the same manner. Ensure the switch is placed in the on position and you are applying power to the switch via the leads you created. If your component operates during this stage, then we know it is either faulty wiring or a connection in between the battery source and the switch.
Electrical problems on boats can prove to be a challenge to your patience, your time, your wallet and your mental health. Nonetheless, it is a necessary evil we must confront when we use electrical components in saltwater and nearly every electrical problem on a boat can be traced to some form of corrosion. Therefore, invest a few hours and get in your console and bilge at least once a year and check your connections and spray your electronics down with a corrosion inhibitor to save yourself some time on the backend. Stay safe and enjoy yourself on the water.